Discover adorable and easy-to-make crochet octopus patterns perfect for beginners. These fun designs‚ available as PDFs‚ offer clear instructions and are great for new crocheters to create charming projects.
What Makes This Pattern Perfect for Beginners
This crochet octopus pattern is ideal for those new to crochet‚ featuring simple stitches and clear instructions. It uses basic techniques like single crochet and half double crochet‚ making it easy to follow. The pattern is designed to be worked in one piece or with minimal sewing‚ reducing complexity. Detailed step-by-step guides and video tutorials are often included‚ ensuring beginners can understand each step. Many patterns are available as free or paid PDFs‚ offering flexibility for all crafters. The no-sew design eliminates the need for assembly‚ allowing beginners to focus on crocheting. With its straightforward approach and minimal materials‚ this pattern is perfect for building confidence and skill in crochet.
Why Choose a PDF Pattern?
PDF patterns are a convenient and accessible way to enjoy crochet projects. They are instantly downloadable‚ allowing you to start your project right away. PDFs are often ad-free‚ making the instructions easy to read and follow. Many PDF patterns include high-quality photos‚ step-by-step guides‚ and clear tutorials‚ which are especially helpful for beginners. They can be printed or viewed on a device‚ offering flexibility for crocheters. Additionally‚ PDF patterns support designers and creators‚ ensuring they can continue to provide high-quality content. Whether you’re looking for a free or paid option‚ PDF patterns are a practical choice for learning and completing your crochet octopus project.
Materials Needed for the Octopus Pattern
Gather essential crochet supplies‚ including yarn‚ hooks‚ stuffing‚ and stitch markers. Refer to the detailed lists in subsequent sections for specific requirements and recommendations.
Yarn Selection
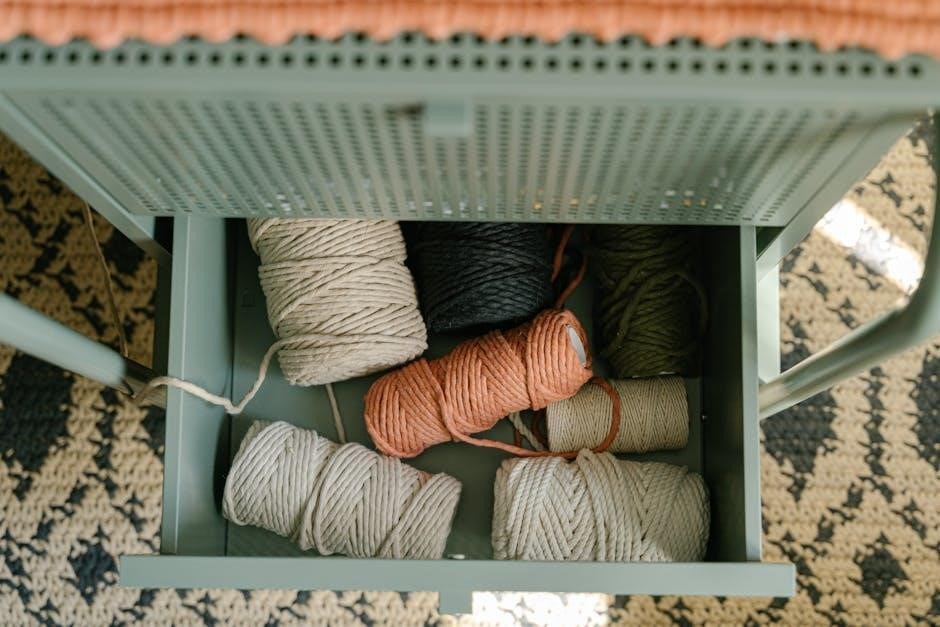
Choosing the right yarn is crucial for your crochet octopus project. Medium-weight yarns like acrylic or cotton blends are ideal for beginners‚ as they are soft‚ durable‚ and easy to work with. Opt for a yarn with good stitch definition to ensure your crochet stitches are visible. Pastel shades or bright colors can add personality to your octopus. Consider the fiber content—acrylic yarns are affordable and easy to care for‚ while cotton offers a natural‚ breathable feel. Ensure the yarn weight matches the recommended hook size for the best results. Always check the yarn label for gauge information to maintain consistency in your project. Selecting the right yarn will ensure your octopus turns out cuddly and visually appealing.
Crochet Hook Size
Selecting the right crochet hook size is essential for achieving the desired texture and size of your octopus. Most beginner-friendly patterns recommend using a 3.5mm to 4mm hook‚ depending on the yarn weight. A smaller hook will result in a tighter stitch‚ while a larger hook will create a looser fabric. Always refer to the pattern’s specifications‚ as it may suggest a particular hook size for the best results. Using the correct hook size ensures your octopus is the right size and has a soft‚ cuddly texture. If you’re unsure‚ start with the recommended size and adjust based on your tension. Proper hook size is key to a successful and adorable crochet octopus project.
Stuffing Material
Polyester fiberfill is the most commonly recommended stuffing material for crochet octopus patterns‚ as it provides a soft‚ cuddly texture. It’s widely available and easy to work with‚ making it ideal for beginners. When stuffing your octopus‚ use small handfuls to fill the body and head evenly‚ ensuring it’s firm but not overly stuffed. Avoid overstuffing‚ as it can make the octopus stiff and less adorable; For a more eco-friendly option‚ some crafters use natural fibers like wool or cotton batting. Always choose a material that suits your project’s needs and ensures the octopus has a huggable‚ professional finish. Proper stuffing will bring your crochet octopus to life‚ making it a perfect companion or gift.
Stitch Markers
Stitch markers are essential tools for crocheters‚ especially when working on beginner-friendly octopus patterns. They help track the start of rounds‚ specific stitches‚ or increases/decreases‚ ensuring accuracy and preventing mistakes. For no-sew designs‚ markers are crucial for keeping track of continuous rounds without joining. Small plastic or metal markers are ideal‚ but you can also use scrap yarn or even paper clips in a pinch. Placing a marker at the beginning of a round saves time and frustration‚ allowing you to focus on creating your adorable octopus. Proper use of stitch markers ensures even tension and helps maintain the shape of your project‚ making it easier to achieve professional-looking results. They are a simple yet vital accessory for any crocheter’s toolkit.
Scissors and Tapestry Needle
Scissors and a tapestry needle are indispensable tools for completing a beginner-friendly crochet octopus pattern. Sharp‚ dedicated scissors are essential for cleanly cutting yarn‚ ensuring smooth transitions between colors or at project completion. A tapestry needle‚ with its blunt tip and large eye‚ is perfect for weaving in ends‚ sewing seams‚ or attaching small details like eyes. These tools help maintain a neat and professional finish‚ especially for no-sew designs where yarn tails must be securely woven in. Proper use of scissors and a tapestry needle ensures your octopus looks polished and adorable‚ making them must-haves in every crocheter’s toolkit for a successful and enjoyable crafting experience.
Basic Crochet Stitches for Beginners
Mastering basic crochet stitches like the magic ring‚ single crochet‚ half double crochet‚ and slip stitch is essential for creating a beginner-friendly octopus. These stitches form the foundation of your project.
Magic Ring
The magic ring is a fundamental technique in amigurumi crochet‚ perfect for starting the octopus body. It allows you to create a small‚ tight circle without leaving a gap. To make a magic ring‚ loop the yarn and crochet the first stitches into the loop. Pull the yarn tail gently to tighten the ring. This method is ideal for beginners as it eliminates the need for chaining and ensures a neat start. Many PDF patterns include step-by-step photos or videos to guide you through this essential skill‚ making it easier to master. Practice the magic ring to ensure a professional finish for your octopus project.
Single Crochet
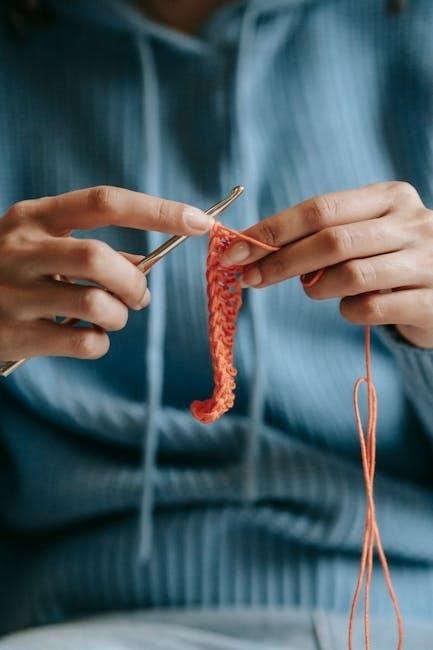
The single crochet (sc) is a foundational stitch in crochet‚ essential for creating the body and tentacles of your octopus. It is worked by inserting the hook into a stitch‚ yarning over‚ pulling up a loop‚ yarning over again‚ and pulling through both loops. This stitch is perfect for beginners as it creates a smooth‚ flat fabric ideal for amigurumi projects. Many beginner-friendly PDF patterns use the single crochet stitch extensively‚ ensuring a soft and cuddly texture for your octopus. Practice the single crochet to achieve even tension‚ which is crucial for a professional-looking finish. This stitch is also versatile‚ allowing you to shape and form the octopus’s features seamlessly. Mastering the single crochet will make your crochet journey enjoyable and rewarding.
Half Double Crochet
The half double crochet (hdc) is a versatile stitch that adds texture and dimension to your octopus project. It is slightly taller than the single crochet‚ making it ideal for shaping and creating a more defined structure. To work a half double crochet‚ yarn over‚ insert the hook into the stitch‚ yarn over again‚ pull up a loop‚ yarn over‚ and pull through all three loops. This stitch is often used in beginner-friendly PDF patterns to create a soft‚ yet sturdy fabric for the octopus’s body or tentacles. The half double crochet is a great stitch for beginners to learn‚ as it works up quickly and adds visual interest to your project. Mastering the hdc will enhance your crochet skills and allow you to create more complex designs with ease.
Slip Stitch
The slip stitch (sl st) is a fundamental crochet stitch used to join rounds or to fasten off your work. It creates a nearly invisible seam‚ making it ideal for amigurumi projects like octopuses. To work a slip stitch‚ insert your crochet hook into the designated stitch‚ yarn over‚ and pull the yarn through both the stitch and the loop on your hook. This stitch is essential for closing the top of the octopus’s head or for joining tentacles seamlessly. In many beginner-friendly PDF patterns‚ the slip stitch is used to ensure a clean finish without bulky seams. Mastering the slip stitch will help you achieve a professional-looking octopus with a smooth‚ cohesive design. It’s a simple yet crucial technique for any crocheter to learn.
Choosing the Right Hook and Yarn
Selecting the right hook and yarn ensures your octopus crochet project turns out as expected. The hook size and yarn weight determine the size‚ texture‚ and overall look of your octopus. Most beginner-friendly PDF patterns provide specific recommendations for hook and yarn to help you achieve the best results and ensure a smooth‚ enjoyable crochet experience.
Hook Size Considerations
Choosing the correct hook size is crucial for achieving the desired texture and size of your crochet octopus. Most beginner-friendly PDF patterns specify the recommended hook size‚ typically ranging from 3.5mm to 5mm‚ depending on the yarn weight. Using a hook that’s too small can result in a stiff fabric‚ while a hook that’s too large may lead to a loose‚ floppy texture. It’s important to follow the pattern’s guidelines to ensure your octopus turns out as intended. If you’re unsure‚ start with the recommended size and adjust based on your personal tension. Consistency is key to creating a cohesive and adorable amigurumi octopus that will be both durable and cuddly.
Yarn Weight and Fiber
When selecting yarn for your crochet octopus‚ consider both weight and fiber to achieve the desired texture and durability. Medium-weight yarns‚ such as acrylic or cotton blends‚ are ideal for beginners as they provide a soft‚ cuddly texture while maintaining structure. Acrylic yarns are easy to work with‚ come in a variety of colors‚ and are machine washable‚ making them perfect for amigurumi projects. Cotton yarns‚ on the other hand‚ offer a slightly stiffer fabric‚ which can be beneficial for maintaining the octopus’s shape. Avoid overly bulky yarns‚ as they can make the details less defined. Always match the yarn weight to the recommended hook size for the best results. The right yarn choice will ensure your octopus is both adorable and long-lasting.
Step-by-Step Guide to Crocheting the Octopus
Start with the body‚ then create tentacles‚ shape the head‚ and assemble. Follow the pattern’s instructions for a seamless‚ beginner-friendly experience‚ using stitch markers to stay organized.
Starting the Body
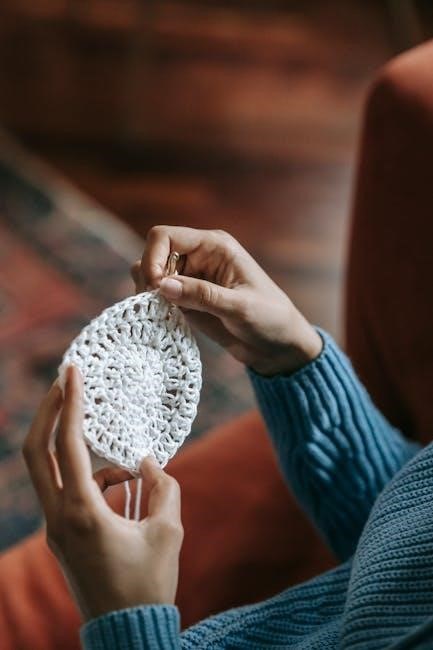
Begin by creating a magic ring‚ a common technique in amigurumi crochet. Secure the ring with a slip stitch‚ then work a series of single crochet stitches into the ring. Ensure the stitches are evenly spaced and the tension is consistent. Use a stitch marker to mark the beginning of the round. Continue crocheting in a spiral‚ working in continuous rounds without joining‚ to form the body shape. This method keeps the project seamless and easy to follow. Keep the body small and compact‚ as the tentacles will be added later. Follow the pattern’s instructions for the exact number of stitches and rounds needed to achieve the desired size and shape for your octopus body.
Creating the Tentacles
Once the body is complete‚ it’s time to create the tentacles. For a beginner-friendly design‚ most patterns suggest creating tentacles by working in chains or using simple single crochet stitches. Start by chaining a desired length for the tentacle‚ then work back along the chain using single crochet stitches. Alternatively‚ some patterns use a series of half double crochet stitches to create a wavy‚ ocean-inspired texture. Attach the tentacles evenly around the body using a slip stitch or by sewing them on. Ensure the tentacles are of equal length for a balanced look. Use stitch markers to help position them evenly. This step is straightforward and requires minimal shaping‚ making it perfect for those new to amigurumi crochet.
Shaping the Head
Shaping the head of your crochet octopus is a simple process that adds character to your finished piece. Begin by creating a small circle using the magic ring technique. Work a few rounds of single crochet stitches to form the basic shape. To create a rounded head‚ increase stitches evenly around the circle. Once the desired size is reached‚ continue with a few more rounds without increasing to shape the head smoothly. Secure the head to the top of the body using a slip stitch or by sewing it in place. For a seamless look‚ ensure the head aligns with the body’s shape. This step is quick and requires minimal shaping‚ making it easy for beginners to achieve a cute and proportional head for their octopus.
Assembling the Octopus
Assembling your crochet octopus is a fun and rewarding step that brings all the pieces together. Start by gathering the body‚ head‚ and tentacles. Attach the tentacles evenly around the base of the body using a slip stitch or by sewing them in place. Ensure the tentacles are spaced equally for a balanced look. Next‚ secure the head to the top of the body‚ aligning it neatly for a seamless appearance. Use a tapestry needle to weave in any yarn ends to keep the octopus looking tidy. If desired‚ add stuffing to the head and body for a fuller shape. Finally‚ shape the octopus gently with your hands to create a natural‚ rounded form. This simple assembly process completes your adorable crochet octopus‚ ready to charm anyone who sees it!

Customizing Your Octopus
Personalize your crochet octopus with unique touches. Change colors for a vibrant look‚ add expressive eyes‚ or adjust sizes for variety. Make it truly one-of-a-kind with simple tweaks!
Changing Colors
Changing colors is a fantastic way to personalize your crochet octopus. For beginners‚ it’s easy to switch hues to create unique‚ vibrant‚ or themed designs. Simply fasten off the current color and join the new yarn at the next stitch. Many patterns allow color changes at specific rounds or rows‚ ensuring a seamless transition. Use stitch markers to keep track of the first stitch when switching colors. This technique works well for creating contrasting tentacles‚ heads‚ or even multi-tonal bodies. Opt for complementary shades to make your octopus stand out. Experiment with ombre effects or seasonal colors for a personalized touch. This simple customization adds character to your finished project without complicating the pattern.
Adding Eyes and Features
Adding eyes and features brings your crochet octopus to life. Use black yarn‚ embroidery floss‚ or safety eyes for a charming expression. Sew or crochet small circles for eyes‚ placing them symmetrically on the head. For details like mouths or eyebrows‚ embroidery floss works perfectly. Attach features securely with a tapestry needle. Some patterns suggest crocheting separate pieces for eyes and sewing them on. This step is simple yet transformative‚ giving your octopus personality. Choose contrasting colors for visibility. Safety eyes are great for durability and a professional finish. These small touches make your octopus uniquely expressive. Personalize your project with creative details to create a one-of-a-kind design.
Size Variations
Crochet octopus patterns come in various sizes‚ catering to different preferences and purposes. From mini octopuses for keychains to larger ones for cuddly toys‚ the size can be adjusted by changing yarn weight or hook size. Use bulky yarn for a quick‚ oversized octopus‚ or fine yarn for a delicate design. Patterns often include guidelines for resizing‚ making it easy to customize. Small octopuses are perfect for gifts or decorations‚ while larger ones make great pillows or stuffed animals. Adjusting the size allows you to create unique pieces tailored to your needs. This versatility ensures that every crafter can find the perfect size to suit their project goals and skill level.
No-Sew Crochet Octopus Pattern
A no-sew crochet octopus pattern simplifies the process by working in continuous rounds‚ eliminating the need for assembly. Perfect for beginners‚ it makes the project quick and enjoyable.
Benefits of a No-Sew Design
A no-sew crochet octopus pattern offers numerous advantages‚ especially for beginners. It eliminates the need for tedious assembly‚ saving time and effort. This design works in continuous rounds‚ meaning you can complete the project in one piece without sewing parts together. The absence of sewing also reduces the number of tools required‚ making it more accessible for those with limited supplies. Additionally‚ no-sew patterns are less intimidating for beginners‚ as they focus solely on crocheting skills. The simplicity of this design allows for a faster completion time‚ providing a sense of accomplishment. It’s also ideal for customizing‚ as you can easily adjust colors or sizes. Overall‚ a no-sew design streamlines the process‚ making it enjoyable and stress-free for new crocheters to create adorable octopus projects.
Working in Continuous Rounds
Working in continuous rounds is a key feature of no-sew crochet octopus patterns‚ particularly suitable for beginners. This method involves crocheting in a spiral without joining rounds‚ allowing seamless construction of the body and tentacles. Stitch markers are essential to track the start of each round‚ ensuring clarity and accuracy. By eliminating the need to join rounds with slippers‚ this technique reduces bulkiness and creates a smoother finish. Continuous rounds also make it easier to maintain even tension‚ crucial for maintaining the octopus’s shape. This approach simplifies the crocheting process‚ making it ideal for new crocheters to achieve professional-looking results without advanced skills. The result is a cohesive‚ visually appealing octopus that requires minimal effort to assemble.
Using Stitch Markers Effectively
Stitch markers are invaluable tools for crocheting an octopus‚ especially for beginners. They help track the start of rounds in continuous crocheting‚ ensuring pattern accuracy and minimizing errors. Place a marker at the beginning of each round and move it as you progress‚ maintaining clear visibility of your work. This technique is particularly useful in no-sew patterns‚ where seamless construction is key. By marking crucial stitches‚ you can easily identify increases‚ decreases‚ or color changes‚ keeping your project organized. Small‚ sturdy markers are ideal for this purpose‚ preventing them from getting lost or damaging the yarn. Effective use of stitch markers enhances your crocheting experience‚ helping you stay focused and confident throughout the project.
Troubleshooting Common Issues
Identify and fix common mistakes like uneven tentacles or loose stitching by checking stitch counts and tension. Use stitch markers to track rounds and ensure pattern accuracy easily.
Common Mistakes
One of the most common mistakes beginners make when crocheting an octopus is miscounting stitches‚ leading to uneven tentacles or a misshapen body. Another frequent error is improper tension‚ which can cause the octopus to be too tight or too loose. Forgetting to place or move stitch markers can result in losing track of rounds‚ especially in no-sew patterns. Additionally‚ some beginners might not stuff the body firmly enough‚ causing the octopus to appear flat. It’s essential to follow the pattern closely and double-check each step to avoid these issues. Using the right hook size and yarn weight also helps prevent mistakes and ensures a professional finish.
Adjusting Tension
Adjusting tension is crucial for achieving the right texture in your crochet octopus. If your stitches are too tight‚ the octopus may appear stiff or misshapen‚ while loose stitches can make it floppy. To maintain even tension‚ ensure you’re using the recommended hook size and yarn weight. Start with a swatch to check your gauge‚ and adjust your hook size if necessary. Relax your stitches as you crochet‚ as gripping the yarn too tightly can lead to unevenness. If you notice inconsistencies‚ try switching to a different yarn or hook to find a balance. Using stitch markers can also help you stay consistent and avoid loose or tight spots. Remember‚ practice makes perfect‚ so don’t stress if it takes time to find your rhythm!
Fixing Stitch Count Errors

Stitch count errors can easily occur while crocheting an octopus‚ especially for beginners. To fix this‚ always count your stitches at the end of each round or row. If you notice a discrepancy‚ gently unravel the last few stitches and re-crochet them‚ ensuring you maintain the correct count. Using stitch markers can help you keep track of your place and prevent errors. If you’ve already completed several rounds with an incorrect count‚ it may be best to frogging (rip out) your work back to the point where the error occurred and start over. Regularly counting your stitches will help you catch mistakes early and ensure your octopus turns out perfectly shaped. Remember‚ patience and attention to detail are key!
Where to Find the Best Beginner-Friendly PDF Patterns
Find beginner-friendly crochet octopus PDF patterns on platforms like Etsy and Ravelry. Look for free or paid options‚ ensuring they include clear instructions and photos for easy learning.
Free Resources
Several websites offer free crochet octopus patterns perfect for beginners. Platforms like mariasbluecrayon.com and Crochet Scout provide downloadable PDFs with step-by-step instructions. These patterns often include photos and video tutorials to guide you through the process. Many designers share free patterns on their blogs‚ such as the “No-Sew Mini Octopus” pattern‚ which is quick and easy to complete. Additionally‚ subscribing to crochet newsletters or joining crochet communities can grant access to free daily patterns. These resources are ideal for those wanting to try amigurumi without committing to paid designs. They offer a great way to practice basic stitches and techniques while creating adorable octopus projects. Always check reviews or descriptions to ensure the pattern suits your skill level;
Paid Patterns
Paid crochet octopus patterns offer premium features for those seeking detailed guidance. Many designers on platforms like Etsy and Ravelry provide ad-free‚ printable PDFs with high-quality photos and step-by-step tutorials. These patterns often include video support and are tailored for beginners‚ ensuring a smooth learning experience. Popular designs‚ such as the “Sleepy Amigurumi Octopus” by Cotton Pod‚ are available for purchase‚ offering clear instructions and tips. Paid patterns are ideal for those who prefer structured‚ professional content and are willing to invest in their crochet journey. They also support independent designers and provide access to exclusive‚ well-curated designs that enhance your crafting skills. Paid options are a great choice for serious beginners looking to create polished‚ professional-looking octopus projects.
Websites and Designers
Explore popular websites and talented designers offering beginner-friendly crochet octopus patterns. Platforms like Etsy‚ Ravelry‚ and Sweet Softies feature a wide range of designs. Designers such as Sharon at Cotton Pod and Maria from mariasbluecrayon.com create patterns that cater to new crocheters. These websites provide ad-free‚ printable PDFs with detailed instructions and photos. Many designers also offer video tutorials to guide beginners through complex steps. Purchasing patterns from these sites supports independent creators and ensures high-quality content. Whether you’re looking for amigurumi octopuses or appliqué designs‚ these platforms and designers offer the perfect resources to enhance your crochet skills and bring your projects to life.