
Honeywell TH6110D1021 Manual: A Comprehensive Guide
This guide details the Honeywell FocusPRO TH6110D series, offering operating instructions and installation guidance, alongside troubleshooting tips and support resources in PDF format.
The Honeywell TH6110D1021 is a programmable thermostat designed for efficient home climate control. As part of the FocusPRO TH6110D series, it offers users a balance of functionality and ease of use. This thermostat is widely recognized for its reliability and compatibility with various heating and cooling systems. Understanding its features and operation is key to maximizing energy savings and comfort.
This manual provides a comprehensive overview, covering everything from initial installation and wiring diagrams to daily operation and troubleshooting. Whether you’re a homeowner or a professional installer, this guide will equip you with the knowledge needed to properly set up and maintain your Honeywell TH6110D1021 thermostat. Access to the PDF manual ensures readily available support and detailed instructions.
Understanding the FocusPRO TH6110D Series
The Honeywell FocusPRO TH6110D series represents a popular line of programmable thermostats known for their user-friendly interface and dependable performance. These thermostats, including the TH6110D1021 model, are designed to provide precise temperature control and energy efficiency for residential heating and cooling systems. They offer features like programmable schedules, multiple operating modes (Heat, Cool, Off, Auto), and temporary/permanent hold functions.
The series aims to simplify home comfort management, allowing users to customize settings to fit their lifestyles. Accessing the operating manual, often available as a PDF, is crucial for understanding the full capabilities of these devices. The FocusPRO series is compatible with a wide range of systems, making it a versatile choice for many homes.

Key Features and Benefits
The Honeywell TH6110D1021 boasts several key features enhancing home comfort and energy savings. Programmable 7-day schedules allow customized temperature settings, reducing energy waste when occupants are away. Multiple system modes – Heat, Cool, Off, and Auto – provide flexible control over your HVAC system. The intuitive interface simplifies navigation and programming, even for first-time users.
Benefits include precise temperature management, leading to increased comfort and lower energy bills. Temporary and permanent hold functions offer convenient overrides to scheduled settings. Easy access to the manual, often in PDF format, ensures users can fully utilize all features. Its compatibility with various systems makes it a versatile upgrade for many homes, offering reliable performance and ease of use.

Installation Guide
Proper installation requires verifying package contents, adhering to safety precautions, and carefully following the wiring diagram for correct terminal identification and secure connections.
Package Contents Verification
Before beginning the installation process, it’s crucial to meticulously verify that all necessary components are present within the Honeywell TH6110D1021 package. Typically, you should find the thermostat unit itself, a mounting baseplate designed for wall attachment, and screws for securing both the baseplate and the thermostat to the wall.
Additionally, confirm the inclusion of wire labels – essential for accurate wiring – and detailed installation instructions, often provided as a separate booklet or within the comprehensive user manual available in PDF format. Some packages may also contain a screwdriver or other small tools to aid in the installation.
Carefully inspect each item for any signs of damage that may have occurred during shipping. If any components are missing or damaged, immediately contact Honeywell support or the retailer from whom you purchased the thermostat to request replacements before proceeding with the installation.
Safety Precautions Before Installation
Prior to commencing any installation work on your Honeywell TH6110D1021 thermostat, utmost caution is paramount. ALWAYS disconnect the power supply to your heating and cooling system at the breaker box to prevent electrical shock. Confirm the power is off using a non-contact voltage tester.
If you are unfamiliar with electrical wiring, it is strongly recommended to enlist the services of a qualified HVAC technician. Incorrect wiring can lead to system malfunction, damage, or even pose a safety hazard.
Read the complete installation manual, available as a PDF download, before starting. Be mindful of the system’s voltage requirements and ensure compatibility. Avoid installing the thermostat in areas exposed to direct sunlight, extreme temperatures, or moisture. Proper safety practices are essential for a successful and secure installation.

Wiring Diagram and Terminal Identification
The Honeywell TH6110D1021 utilizes a standard wiring configuration. Key terminals include Rh and Rc for 24V power, W for heating, Y for cooling, G for the fan, and C for common wire – essential for consistent power; A detailed wiring diagram is crucial for correct installation, often found within the downloadable PDF manual.

Carefully identify each wire connected to your existing thermostat before disconnecting. Incorrect wiring can damage your HVAC system. The ‘C’ wire, if not present, may require installation for optimal thermostat operation.

Refer to the diagram to match existing wires to the corresponding terminals on the TH6110D1021 base. Double-check all connections before restoring power. A miswired system can lead to malfunctions and potential safety hazards.
Mounting the Thermostat Base
Before mounting, ensure the power to your HVAC system is completely switched off at the breaker. Remove your old thermostat from the wall plate, carefully noting the wire connections. Use the included screws and wall anchors to securely attach the Honeywell TH6110D1021 baseplate to the wall.
Ensure the baseplate is level for accurate temperature readings and a professional appearance. A level base is critical for proper operation. Feed the thermostat wires through the opening in the baseplate.
Confirm the baseplate is firmly mounted before proceeding with wiring. A loose base can cause connection issues. Refer to the installation manual PDF for detailed diagrams and mounting instructions.
Connecting the Wires – Step-by-Step
With the baseplate mounted and power off, carefully connect the wires to the corresponding terminals. Refer to the wiring diagram in the manual PDF and your existing thermostat’s wiring. Typically, wires are labeled with letters like R, C, W, Y, and G.
Gently insert each wire into the correct terminal, ensuring a secure connection. Avoid stripping the wire insulation excessively. Double-check all connections against the wiring diagram before proceeding. Incorrect wiring can damage your HVAC system.
Once all wires are connected, gently push any excess wire back into the wall opening. Secure the thermostat to the baseplate, and restore power at the breaker. Verify proper operation.
Operating Instructions
The Honeywell TH6110D1021 features a user-friendly interface for setting schedules, modes (Heat, Cool, Auto, Off), and temporary/permanent holds for optimal comfort control.
Navigating the Thermostat Interface
The Honeywell TH6110D1021 boasts an intuitive interface designed for ease of use. The main screen prominently displays the current temperature and setpoint. Utilize the up and down arrow buttons to adjust the desired temperature, with clear visual feedback on the display. A “Menu” button grants access to advanced settings, including scheduling, system configuration, and date/time adjustments.
Within the menu, navigation is straightforward, employing a similar arrow-button system. The display utilizes simple icons to represent different functions, enhancing usability. The thermostat supports both manual and programmed operation, selectable directly from the main screen. Pay attention to the mode indicator (Heat, Cool, Auto, Off) to confirm the current system status. Built-in instructions are available, often accessible by pulling out a small guide, simplifying initial setup and operation for all users.
Setting the Date and Time

Accurate date and time settings are crucial for proper scheduling functionality on your Honeywell TH6110D1021 thermostat. To access these settings, press the “Menu” button on the thermostat interface. Navigate through the menu options using the up and down arrow buttons until you locate the “Date/Time” setting. Select this option to begin the adjustment process.
You’ll typically be presented with separate fields for year, month, day, hour, and minute. Use the arrow buttons to increment or decrement each value until it reflects the correct information. Confirm each selection by pressing the “Select” or “Enter” button (the specific button may vary). Ensure you verify AM/PM settings for accurate timekeeping. Once all values are correct, save your changes to activate the new date and time settings, enabling reliable scheduling.
Programming a Heating and Cooling Schedule
The Honeywell TH6110D1021 allows for customized heating and cooling schedules to optimize comfort and energy savings. Access the programming mode via the “Menu” button, then select “Schedule.” You’ll likely encounter options for different day types – weekday, weekend, or individual days. Choose the day type you wish to program.
Within each day type, you can define multiple “periods” (e.g., Wake, Leave, Return, Sleep). For each period, set the desired temperature for both heating and cooling. Utilize the arrow buttons to adjust temperatures and the “Select” button to confirm. Repeat this process for all periods and desired days. Remember to save your schedule after making changes; this ensures the thermostat follows your programmed settings, automatically adjusting temperatures throughout the day.
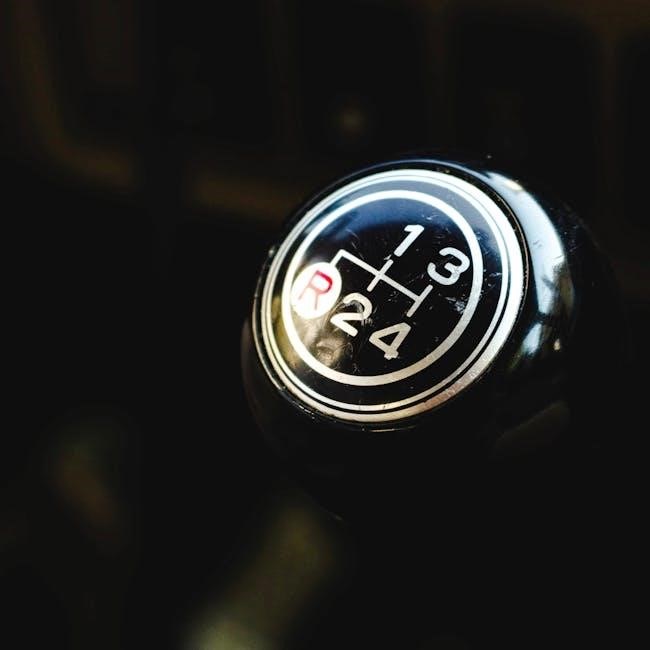
Understanding the System Modes (Heat, Cool, Off, Auto)
The Honeywell TH6110D1021 thermostat offers four primary system modes: Heat, Cool, Off, and Auto. “Heat” mode activates the heating system, maintaining the set temperature by providing warmth. Conversely, “Cool” mode engages the cooling system, lowering the temperature to the desired level. Selecting “Off” completely disables the heating and cooling systems.
“Auto” mode is the most versatile, automatically switching between heating and cooling to maintain your set temperatures. The thermostat intelligently determines whether to activate the heating or cooling system based on the difference between the room temperature and your setpoints. This mode requires both heating and cooling setpoints to be programmed. Use the “Mode” button to cycle through these options, selecting the one that best suits your current needs and preferences for optimal comfort and energy efficiency.
Temporary and Permanent Hold Functions
The Honeywell TH6110D1021 thermostat features both Temporary and Permanent Hold functions, allowing for flexible temperature control. A “Temporary Hold” overrides the programmed schedule until the next scheduled change. To activate, adjust the temperature, and the thermostat will maintain it until the next programmed period begins, then revert to the regular schedule.
“Permanent Hold” overrides the programmed schedule indefinitely, maintaining the selected temperature continuously. This is ideal for extended periods away or when a consistent temperature is desired. To engage Permanent Hold, adjust the temperature and activate the hold function; the thermostat will display an indicator confirming the permanent override. To return to the programmed schedule, you must manually cancel the Permanent Hold.

Troubleshooting Common Issues
This section addresses frequent problems like power failures, inaccurate readings, unresponsive systems, and deciphering error codes for the Honeywell TH6110D1021 thermostat.
Thermostat Not Powering On
If your Honeywell TH6110D1021 thermostat fails to power on, begin by verifying the power supply. Ensure the circuit breaker controlling the thermostat’s wiring is not tripped and is functioning correctly. Next, carefully inspect the thermostat wiring at the terminal connections; loose or disconnected wires are a common cause. Confirm the ‘C’ wire (common wire) is securely connected, as this is essential for providing continuous power.
If the wiring appears secure, check the batteries, if your model utilizes them, replacing them with fresh ones. A faulty transformer can also prevent power; testing the transformer’s output voltage may be necessary. If you’ve recently replaced a smart home device, ensure compatibility and proper installation. If issues persist after these checks, consult a qualified HVAC technician for further diagnosis and repair, as internal component failure may be the cause.
Incorrect Temperature Readings
If your Honeywell TH6110D1021 thermostat displays inaccurate temperature readings, several factors could be at play. First, ensure the thermostat isn’t directly exposed to sunlight, drafts, or heat-generating appliances, as these can skew the sensor readings. Verify the thermostat is level; an unlevel installation can affect accuracy. Check for obstructions blocking airflow around the thermostat.
Next, attempt a thermostat calibration, if your model supports this feature, to adjust the temperature offset. If the problem persists, inspect the wiring connections to ensure they are secure and free from corrosion. A failing temperature sensor within the thermostat itself may require replacement. Consider comparing the thermostat’s reading with a reliable thermometer placed nearby to confirm the discrepancy. If issues continue, professional HVAC assistance is recommended.
System Not Responding to Settings
When your Honeywell TH6110D1021 thermostat fails to respond to your adjustments, begin by verifying the system mode is correctly set (Heat, Cool, Off, Auto). Confirm the programmed schedule hasn’t overridden your desired settings with a temporary or permanent hold. Check the thermostat’s batteries, even if the display is illuminated, as low battery power can cause operational issues.
Inspect the wiring connections at both the thermostat and the HVAC equipment, ensuring they are secure and free from corrosion. A tripped circuit breaker or a blown fuse affecting the HVAC system could also be the culprit. If the wiring appears correct and power is confirmed, the issue might lie within the HVAC system itself, requiring professional diagnosis and repair.
Error Codes and Their Meanings
The Honeywell TH6110D1021 thermostat utilizes error codes to signal specific system malfunctions. While a comprehensive list isn’t readily available without the full manual, common codes indicate issues like sensor failures, wiring problems, or communication errors with the HVAC equipment. A “Low Battery” code signifies the need for battery replacement, even if the display functions.
Other potential codes may relate to heating or cooling system faults, such as a flame rollout issue or compressor problems. Referencing the official Honeywell documentation (available as a PDF download) is crucial for accurate interpretation. If an error code persists after basic troubleshooting—checking wiring and power—contacting a qualified HVAC technician is recommended for diagnosis and repair to prevent further damage.

Resources and Support
Access the Honeywell support website for PDF manuals, FAQs, and contact information; ensuring comprehensive assistance for your TH6110D1021 thermostat needs.
Downloading the PDF Manual
Obtaining the official Honeywell TH6110D1021 manual in PDF format is straightforward and provides a readily accessible, detailed resource for all your thermostat needs. Numerous websites host this document, offering a convenient way to review installation procedures, operating instructions, and troubleshooting guides offline.
A quick online search using terms like “Honeywell TH6110D1021 manual PDF” will yield several download links. Ensure you are downloading from a reputable source to avoid potential security risks. The PDF version allows for easy printing, highlighting, and searching, making it an invaluable tool for both professional installers and DIY enthusiasts. This comprehensive document covers everything from initial setup to advanced programming features, empowering you to maximize the performance and efficiency of your Honeywell thermostat.
Honeywell Support Website and Contact Information
For dedicated assistance with your Honeywell TH6110D1021 thermostat, the official Honeywell Home website (honeywell.com/yourhome) serves as a central hub for support resources. Here, you’ll find an extensive knowledge base, frequently asked questions, and troubleshooting guides specifically tailored to your model.
Direct contact with Honeywell support is also available through their customer service channels. You can typically find a phone number and email address on their website for personalized assistance. When contacting support, having your thermostat’s model number readily available will expedite the process. Honeywell International Inc. is located at 1985 Douglas Drive North, Golden Valley, MN 55422. Utilizing these resources ensures you receive accurate and reliable support for your Honeywell thermostat, maximizing its functionality and lifespan.
Frequently Asked Questions (FAQ)
Q: My thermostat isn’t turning on. A: Verify the power supply – check circuit breakers and ensure proper wiring connections. Q: The temperature reading seems inaccurate. A: Confirm the thermostat isn’t exposed to direct sunlight or drafts, and recalibrate if necessary.
Q: How do I switch between heating and cooling? A: Utilize the manual changeover setting on the thermostat interface. Q: What do the error codes mean? A: Refer to the troubleshooting section of the manual for a comprehensive list of error codes and their corresponding solutions. For further assistance, download the PDF manual or contact Honeywell support. Remember to have your model number (TH6110D1021) available when seeking help.