
Hayward Vari Flo XL Valve Manual: A Comprehensive Guide
This detailed manual provides essential guidance for installing‚ operating‚ and maintaining your Hayward Vari Flo XL valve. It covers parts diagrams‚ troubleshooting‚ and safety precautions.
The Hayward Vari Flo XL valve is a robust and reliable component‚ crucial for efficient pool and spa filtration systems. This valve expertly manages water flow‚ directing it through various components like filters‚ heaters‚ and chlorinators. Understanding its function is key to optimal pool operation. This manual serves as a comprehensive resource‚ detailing installation‚ operation‚ maintenance‚ and troubleshooting procedures for maximizing performance and longevity.
Understanding Valve Components
The Vari Flo XL valve comprises several key components working in harmony. These include the valve body‚ internal mechanism with a multi-port design‚ handle assembly for flow direction‚ and various seals and o-rings ensuring leak-proof operation. Each part is engineered for durability and performance. Familiarizing yourself with these components is vital for effective maintenance and repair procedures‚ as outlined in this manual.
Valve Body Materials
Hayward Vari Flo XL valve bodies are typically constructed from robust thermoplastic materials‚ offering excellent corrosion resistance against pool chemicals. These materials ensure long-lasting performance and withstand varying water pressures. Some models may incorporate reinforced polymers for increased durability. The choice of material is crucial for compatibility with your specific pool system and water chemistry‚ guaranteeing reliable operation.
Internal Mechanism Overview
The Vari Flo XL valve utilizes a robust internal mechanism featuring a rotating ball and port configuration. This design allows for precise flow control and directional changes within your pool’s plumbing. A spring-loaded handle ensures secure positioning‚ while internal seals prevent leakage. Understanding this mechanism is key to effective troubleshooting and maintenance‚ ensuring optimal performance.
Installation Procedures
Proper installation is crucial for reliable valve operation. Begin by carefully reviewing the pre-installation checklist to ensure all necessary components and tools are available. Follow the step-by-step guide‚ paying close attention to pipe alignment and seal placement. Incorrect installation can lead to leaks or reduced flow. Always prioritize safety during the installation process.
Pre-Installation Checklist
Before beginning‚ verify you have the correct Vari Flo XL valve model for your system. Gather necessary tools: wrenches‚ Teflon tape‚ and appropriate pipe fittings. Inspect all valve components for damage. Ensure the plumbing lines are clean and free of debris. Confirm power is off if electrical connections are involved. Review local plumbing codes.
Step-by-Step Installation Guide
Begin by shutting off the water supply. Apply Teflon tape to all threaded connections. Carefully align the valve body with existing plumbing. Securely tighten connections using appropriate wrenches‚ avoiding over-tightening. Double-check for leaks after restoring water pressure; Test valve operation through full range of motion. Verify proper flow direction.
Operating the Vari Flo XL Valve
The Vari Flo XL valve controls water flow within your pool system. Rotate the handle to adjust flow rates to different destinations. Observe the valve markings to understand port configurations. Ensure smooth handle operation; avoid forcing it. Regular adjustments optimize filtration and cleaning cycles. Familiarize yourself with the valve’s response to handle movements.
Valve Handle Functions
The valve handle directs water flow by rotating through marked positions. Each position corresponds to a specific port configuration – filter‚ pump‚ drain‚ or spa. Smooth‚ deliberate movements are key. Avoid excessive force. The handle’s detents provide tactile feedback for accurate positioning. Understand each setting for optimal system performance and efficient water circulation.
Flow Rate Adjustment
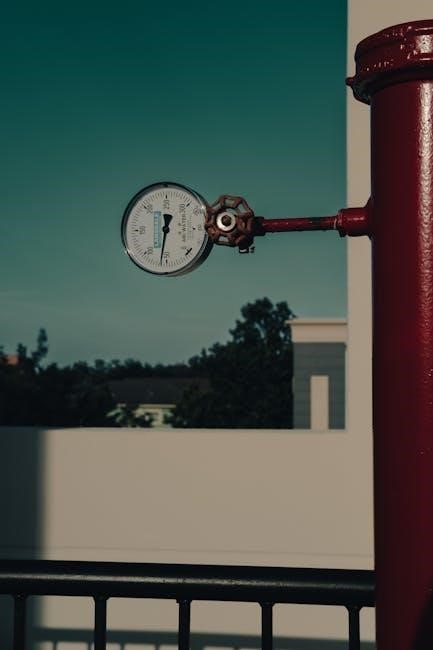
Adjusting flow rate impacts system pressure and filtration effectiveness. While the Vari Flo XL doesn’t have a dedicated flow control‚ altering valve positions influences water velocity. Partial closure of ports creates resistance‚ reducing flow; Monitor pressure gauges during adjustments to prevent pump strain. Optimize flow for desired filtration speed and energy efficiency.
Troubleshooting Common Issues

Addressing problems promptly ensures optimal pool system performance. Common issues include valve leaks‚ often stemming from worn seals or loose connections. Handle stiffness or jamming can occur due to debris or lack of lubrication. Diagnose issues systematically‚ checking for obvious causes before disassembling components. Refer to detailed sections for specific solutions.
Valve Leaks: Causes and Solutions
Leaks typically arise from deteriorated valve seals‚ cracked housings‚ or loose connections. Begin by tightening all fittings; inspect O-rings and replace if damaged. A cracked valve body necessitates replacement. Ensure proper alignment during reassembly. For persistent leaks‚ examine the internal mechanism for wear. Always depressurize the system before repairs.
Handle Stiffness or Jamming

Handle stiffness often results from debris accumulation or lack of lubrication. Clean the valve body and handle stem thoroughly. Apply a silicone-based lubricant to the stem and internal components. If jamming persists‚ inspect for corrosion or physical obstructions. Avoid forceful manipulation‚ which can cause damage. Disassembly may be required for a comprehensive cleaning.
Winterization and Storage
Proper winterization prevents freeze damage. Drain all water from the valve body and connected lines. Remove drain plugs and open the valve to facilitate complete drainage. Store the valve in a dry‚ frost-free location. For long-term storage‚ apply a silicone lubricant to internal parts to prevent corrosion. Inspect seals before re-installation.
Proper Drain-Down Procedures
Begin by shutting off power to the pump. Open the valve to the waste line and remove all drain plugs. Manually cycle the valve through all positions to ensure complete water expulsion. Utilize a blower to clear remaining water in the lines. Inspect for any residual water and repeat if necessary. Securely replace drain plugs after complete drainage.
Long-Term Storage Guidelines
After thorough draining‚ ensure the valve is completely dry to prevent corrosion. Apply a silicone-based lubricant to all seals and O-rings. Store the valve in a cool‚ dry environment‚ protected from direct sunlight and extreme temperatures. Cover with a protective sheet to prevent dust accumulation. Periodically inspect for any signs of deterioration.
Maintenance and Cleaning
Regular maintenance extends the valve’s lifespan. Inspect for cracks‚ wear‚ and leaks during each use. Clean the valve body with mild soap and water‚ avoiding abrasive cleaners. Lubricate O-rings and seals periodically with a silicone-based lubricant. Remove any debris from the valve ports to ensure smooth operation and prevent clogging.
Regular Inspection Points
Focus inspections on the valve body for cracks or corrosion. Check the handle for smooth operation and secure attachment. Examine O-rings and seals for wear‚ brittleness‚ or damage. Inspect valve ports for obstructions or debris buildup. Verify proper alignment of internal components. Regularly assess for any signs of leakage around connections.
Cleaning Procedures for Valve Components
Disassemble the valve carefully‚ noting component positions. Use a mild detergent and water solution to clean all parts. Avoid abrasive cleaners that could damage seals. Rinse thoroughly to remove all soap residue. Inspect O-rings and replace if worn. Lubricate O-rings with a silicone-based lubricant before reassembly. Ensure all parts are dry before final assembly.
Parts Replacement
Genuine Hayward replacement parts are crucial for optimal performance. Identify the specific part needed using the parts diagram within this manual. Ensure compatibility with your valve model before ordering. Always disconnect power before disassembly. Replace worn O-rings‚ seals‚ and the valve handle if necessary. Refer to the diagrams for correct installation procedures.
Identifying Required Parts
Accurate part identification is vital for successful repairs. Consult the detailed Hayward parts diagrams provided in this manual. Note the valve model number and date code for precise matching. Cross-reference part numbers with Hayward’s official catalog; Consider the specific issue – a leaking seal requires a new seal‚ a stiff handle may need lubrication or replacement.
Hayward Parts Diagrams
Detailed exploded views illustrate each component of the Vari Flo XL valve. These diagrams are crucial for identifying parts during maintenance or repair. Each part is labeled with a unique number‚ corresponding to the parts list. Refer to these diagrams alongside the ‘Identifying Required Parts’ section for accurate replacements. Ensure clarity before ordering.

Safety Precautions

Always disconnect power before servicing the valve to prevent electrical shock. Exercise caution when handling chemicals used in pool water treatment; wear appropriate protective gear. Never attempt to repair the valve while the system is pressurized. Follow all local codes and regulations. Ensure proper ventilation during maintenance. Prioritize personal safety.
Electrical Safety Considerations
Always disconnect the power supply before performing any maintenance or inspection. Verify proper grounding of the system to prevent electrical hazards. Inspect wiring for damage before each use. Never work with electrical components while standing in water. Use insulated tools. Consult a qualified electrician for complex repairs.
Handling Chemical Exposure
Always wear appropriate personal protective equipment (PPE) – gloves‚ eye protection‚ and respirators – when handling pool chemicals. Avoid direct contact with chemicals. Ensure adequate ventilation. In case of skin or eye contact‚ flush immediately with water. Refer to the chemical’s Material Safety Data Sheet (MSDS).
Valve Configurations and Applications
The Vari Flo XL valve is versatile‚ suitable for various pool and spa configurations. It excels in multi-port valve systems‚ directing flow for filtration‚ backwash‚ and waste. Ensure compatibility with your existing pool equipment – pumps‚ filters‚ heaters. Proper configuration optimizes system performance and longevity.
Multi-Port Valve Systems
The Vari Flo XL valve seamlessly integrates into multi-port valve systems. It efficiently directs water flow for essential functions: filter‚ backwash‚ rinse‚ waste‚ and recirculate. Correct positioning is crucial for optimal performance and preventing damage. Regularly inspect the valve for proper operation within these systems.
Compatibility with Pool Equipment
The Hayward Vari Flo XL valve demonstrates broad compatibility with various pool equipment brands. It’s designed for use with pumps‚ filters‚ heaters‚ and chlorinators. Ensure proper pipe sizing and connections for optimal flow rates. Verify compatibility with automatic pool cleaners and other accessories before installation. Always adhere to manufacturer guidelines.
Understanding Valve Markings and Codes
Hayward Vari Flo XL valves feature markings crucial for identification and service. Model numbers define valve size and configuration. Date codes indicate manufacturing dates‚ aiding in warranty verification. These codes help trace valve history and ensure parts compatibility. Understanding these markings streamlines troubleshooting and replacement processes. Refer to Hayward’s documentation for detailed decoding information.
Decoding Model Numbers
Hayward Vari Flo XL model numbers contain vital information about the valve. The prefix indicates the valve series (Vari Flo XL). Subsequent digits specify valve size‚ port configuration‚ and material type. Decoding these numbers allows precise identification for ordering replacement parts or seeking technical support. Consult Hayward’s official documentation for a comprehensive breakdown of each digit’s meaning.
Date Codes and Manufacturing Information
Hayward Vari Flo XL valves feature date codes indicating the manufacturing date. These codes‚ typically stamped on the valve body‚ help track production batches and quality control. Understanding the date code assists in identifying potential recalls or revisions. Contact Hayward customer support with the code for specific manufacturing details. This information is crucial for warranty claims and troubleshooting.
Advanced Troubleshooting
For complex issues‚ pressure testing is vital to pinpoint internal valve failures. Depressurize the system before disassembly. Inspect O-rings‚ seats‚ and the internal mechanism for wear or damage. Diagnosing failures often requires specialized tools and knowledge. Consult a qualified technician if you’re uncomfortable with these procedures. Document findings for warranty claims.

Pressure Testing Procedures
Isolate the valve and slowly introduce water pressure‚ monitoring for leaks at connections and the valve body. Use a pressure gauge to verify the system meets manufacturer specifications. Observe the valve handle for smooth operation at various pressure levels. Document all readings. Always depressurize before disassembly.
Diagnosing Internal Valve Failures
Reduced flow or inability to switch ports suggests internal component issues. Inspect the valve core for debris or damage. Check O-rings and seals for wear or deterioration. A complete disassembly may be required to identify the root cause. Document findings and replace damaged parts. Professional assistance is recommended.
Warranty Information
Hayward provides a limited warranty covering defects in materials and workmanship. The warranty period varies based on the specific valve model and date of purchase. Proof of purchase is required for all claims; Warranty coverage does not extend to damage caused by improper installation or maintenance. Contact Hayward customer support for claim procedures.
Hayward Warranty Coverage
Hayward’s warranty typically covers one year from the purchase date for manufacturing defects. This includes issues with valve body integrity and internal component malfunctions. The warranty excludes wear-and-tear items‚ damage from chemicals‚ and improper use. Modifications or repairs by unauthorized personnel void the warranty. Retain your receipt for warranty validation.
Claim Procedures
To initiate a warranty claim‚ contact Hayward Customer Support with your model and serial number. Provide proof of purchase and a detailed description of the defect. Hayward may request photos or return of the defective part for inspection. Approved claims will receive repair or replacement at Hayward’s discretion. Shipping costs may apply.
Frequently Asked Questions (FAQ)
Q: Why is my valve leaking? A: Check connections and the internal seal. Q: How often should I inspect the valve? A: Annually‚ or more frequently with heavy use. Q: Can I repair the valve myself? A: Yes‚ with proper knowledge and parts. Q: Where can I find replacement parts? A: Authorized Hayward dealers.
Common User Queries
Users frequently ask about valve handle stiffness‚ often due to debris or lack of lubrication. Others inquire about identifying the correct replacement parts using the valve’s model number. Leakage around the valve body is a common concern‚ usually stemming from loose connections or worn seals. Winterization procedures are also frequently requested.

Quick Reference Guide
For handle stiffness‚ lubricate the stem with a silicone-based lubricant. To identify parts‚ locate the model and date codes on the valve body. Check all connections for leaks and tighten as needed. Always fully drain the valve before winterizing. Refer to the parts diagram for accurate component identification during replacement.

Resources and Support
Hayward offers comprehensive customer support for the Vari Flo XL valve. Visit the official Hayward website for downloadable manuals and detailed documentation. Contact their support team directly for assistance with troubleshooting or parts inquiries. Online resources include FAQs and helpful videos demonstrating installation and maintenance procedures. Ensure you have your valve’s model number readily available when contacting support.
Hayward Customer Support Contact Information
For direct assistance‚ contact Hayward’s customer support team. Their phone number is readily available on the Hayward website. You can also reach them via email through the “Contact Us” section of their official online portal. Live chat support may also be an option during business hours. Prepare your valve’s model and serial number before contacting them for efficient service.
Online Manuals and Documentation
Hayward provides a comprehensive library of online resources. Access detailed manuals‚ parts lists‚ and troubleshooting guides directly on the Hayward website. Search by valve model number to quickly locate relevant documentation. Downloadable PDFs are available for offline viewing. Explore instructional videos demonstrating installation and maintenance procedures. Register your product online for access to exclusive content.